Knowledge base
Installation
Installing Bulletin is quite straightforward if you’re used to installing plugins from the WordPress.org repo.
Free version
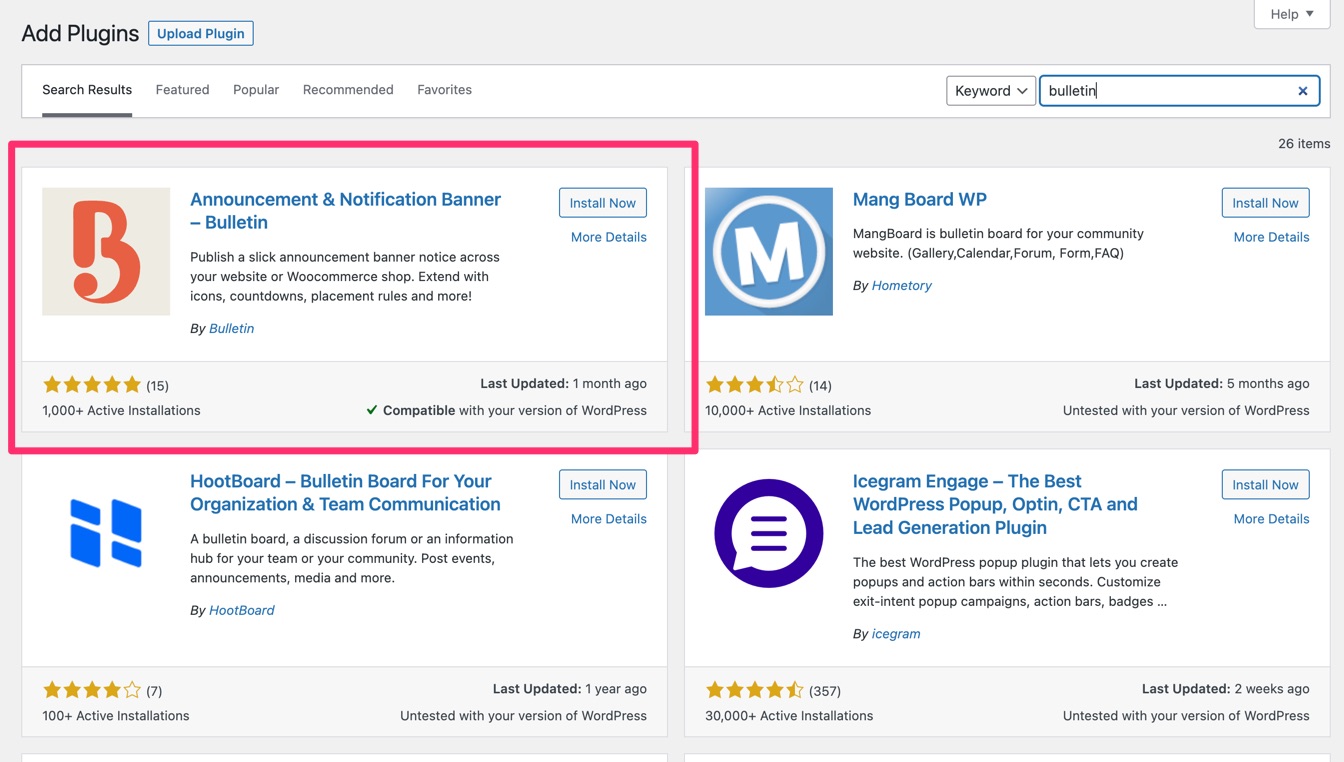
Option 1: search and install the free version within your WP dashboard
Option 2: Download and upload the zip file to your WordPress installation
Pro version
Download the pro version from this website and install in the same way as option 2 of the free version; upload the zip file to your WP admin dashboard, then enable the plugin. This should automatically disable the free version. If not, please manually disable the free version before using the Pro version
Upgrading from Free to PRO
After purchasing the PRO version, please run through the following steps to upgrade the plugin within WordPress:
- Deactivate and remove the Free version
- Upload and activate the PRO version (all your previously published bulletins will still be there!)
Message
In this area we will explain the features of the message area of Bulletin
Messages
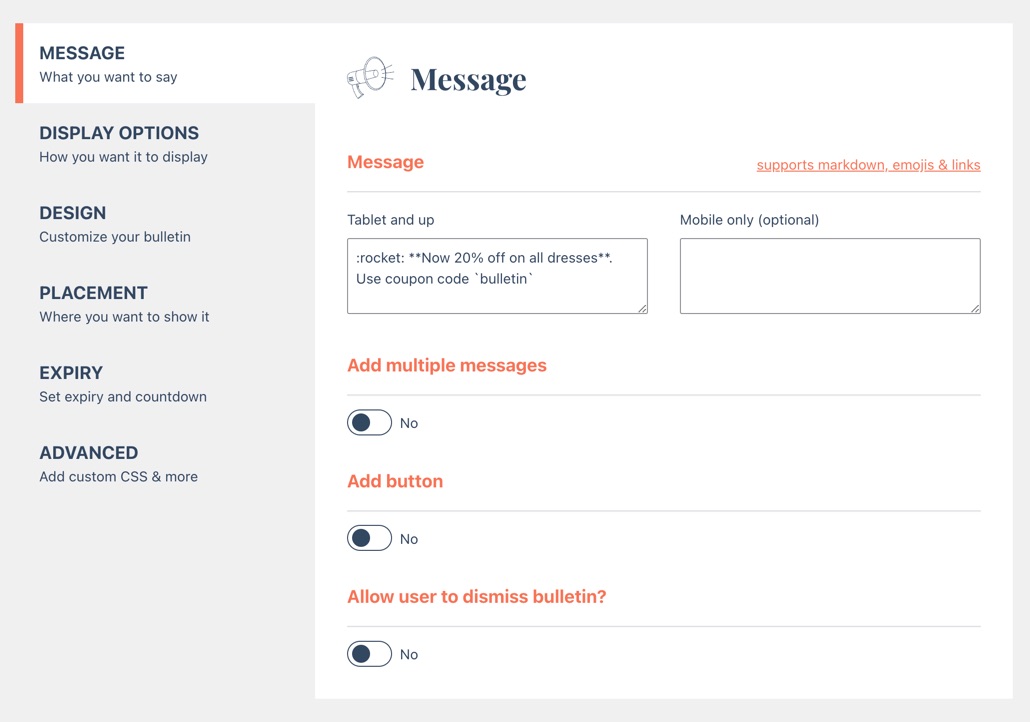
Adding messages is quite straightforward. You can set an optional mobile message, usually shorter for better UX. Then you can use certain markdown tags such as making text bold, italic, code and adding simple links. For links to open in new tabs, you can use HTML as shown in the tooltip. Also you can add emoji’s using tags explained on this page: https://gist.github.com/rxaviers/7360908
Multiple Messages
You can also set multiple messages that will either cycle through or show in a marquee. You can also optionally set the cycle speed (if left blank, this defaults on 3s)
Button
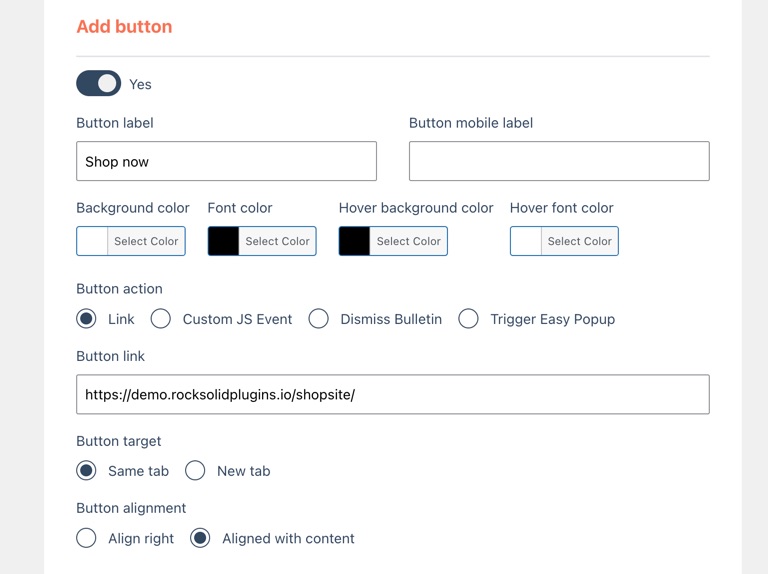
You can add a button that links to an internal or external page. It can also trigger a custom JS event, can be used to dismiss a bulletin (i.e. close it) and integrate with an Easy Popup. You can also select alignment and href target options here
Allow user to dismiss bulletin
This last option on this screen is used to configure the close icon (X) and for how long the bulletin should be hidden for the user. This will inform in hours the cookie which is set in the users’ browser. Type -1 to dismiss forever
Display Options
The display options depend on the type of banner you’ve chosen. For the header banner you will see a “Above header” and “Below header” option. The bulletin will then magically inject itself above your header or below it
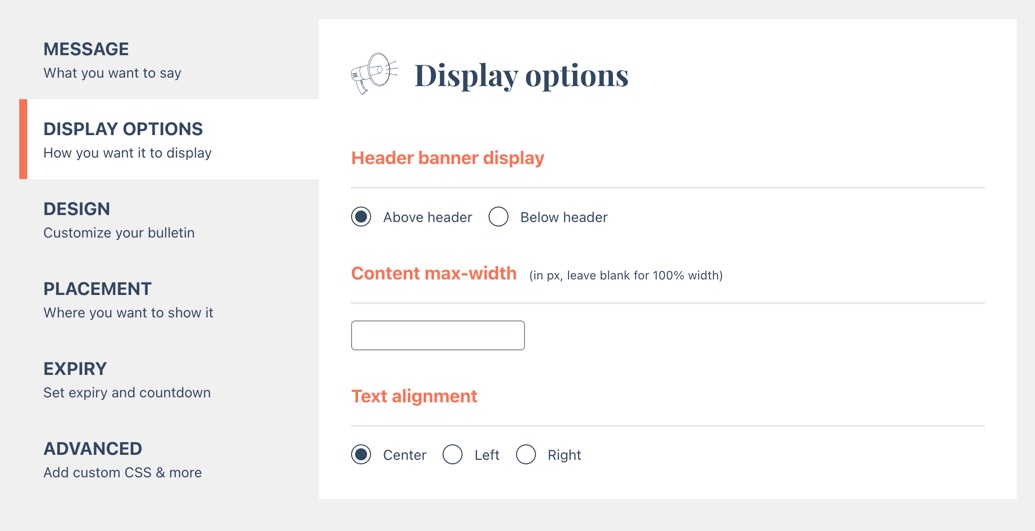
Content max-width
This setting indicates how wide the content will be inside the bulletin (for header banners and sticky footers). For the other types of bulletins (floating at bottom and corner) this will determine how wide the actual element is
Text alignment
Here you can set which alignment you want to give the message
Design
Colors
You can set the background color of the bulletin and the font-color of the text inside of it here
Font size
Override the default font-size here
Text vertical padding
Make the bulletin thicker or thinner
Add icon
You can either choose an icon from a set or upload your own icon. This will then be set on the left side of the message
Add image
You can also add an image either on the left or right of the message. Then set a max width and it will show inside the bulletin. For a header banner, the image will stick out to the bottom and for any footer banner, it will stick out to the top
Fonts
Select from a variety of Google fonts here to customize your Bulletin for various occasions (i.e. use Butcherman for Halloween 👻
Placement
By content
You can choose to show for the bulletin to be included or excluded on certain pages on your site. You can also use wildcards in your entries here e.g. /products/*
By user
You can also configure the bulletin to show only for logged-in users or only for a certain cookie value
Expiry & scheduling
Expire bulletin
Enable this setting to set an end-date and time for your bulletin. After this time has passed the bulletin will be set to inactive and no longer be visible on your site
Also alternatively you can set a countdown to appear on the Bulletin if you enable the “Show Countdown” setting.
Common issues & FAQs
I’ve published a bulletin but cannot see it on my website!
This could be caused by a number of things
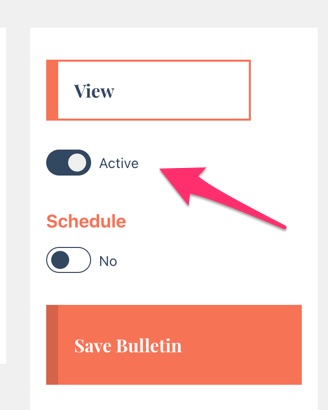
1. Please make sure you’ve set the bulletin to be “active”
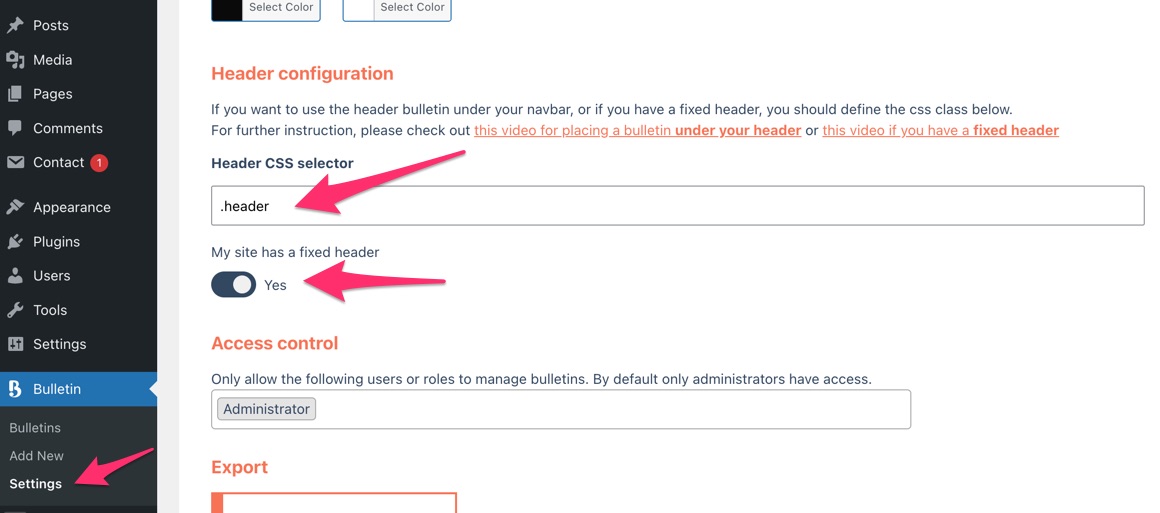
2. If your site uses a fixed/sticky header or navigation, and you’ve published a “header banner”, there could be a chance that the bulletin will be hidden behind your website header. If this is the case please do the following:
– Go into Settings. Then enable the “My site has a fixed header” setting.
– In your site front-end, determine what the class is of your main header element. Then add that into the “Header CSS selector” field (and be sure to include the . for a class or # for an ID selector)
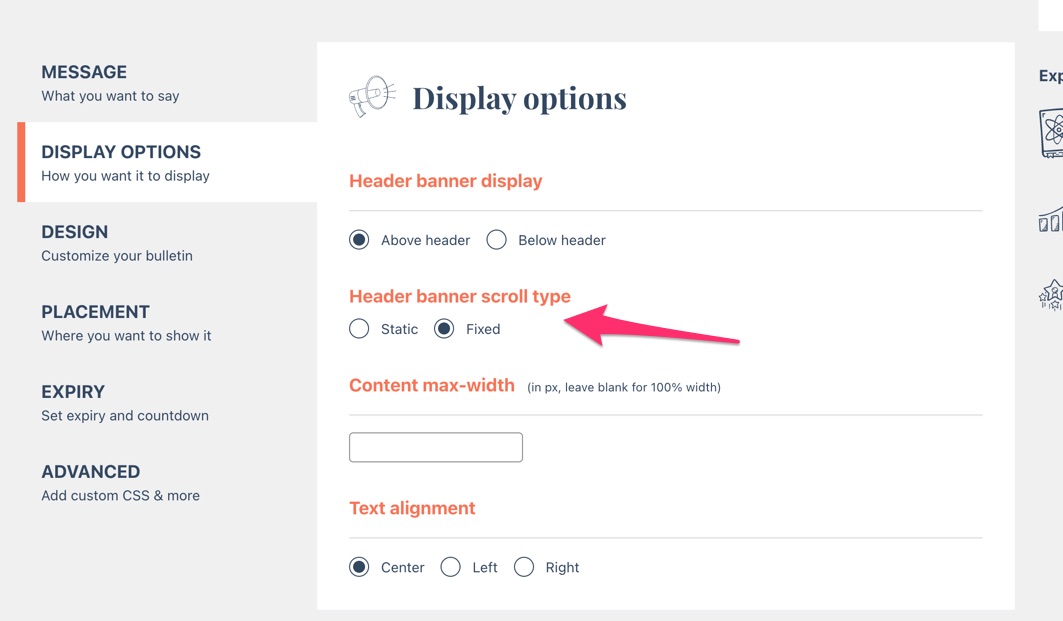
This will then reveal an additional setting in the Display options for a bulletin. Here you can then set the header banner to be fixed (i.e. it will scroll along with the navigation) or static (which means the bulletin will stay in place at the top)
Please note that every theme is built differently and it can be challenging for Bulletin to inject itself in the correct place. If you need further assistance, please don’t hesitate to reach out to us on [email protected]
How do I add links to my bulletins?
You can use markdown in your messages, please see below for instructions. You can use [link text](https://www.google.com) for a simple link that opens in same tab. For new tab links, please use basic HTML as follows <a href="https://google.com" target="_blank">link text (open in new tab)</a>
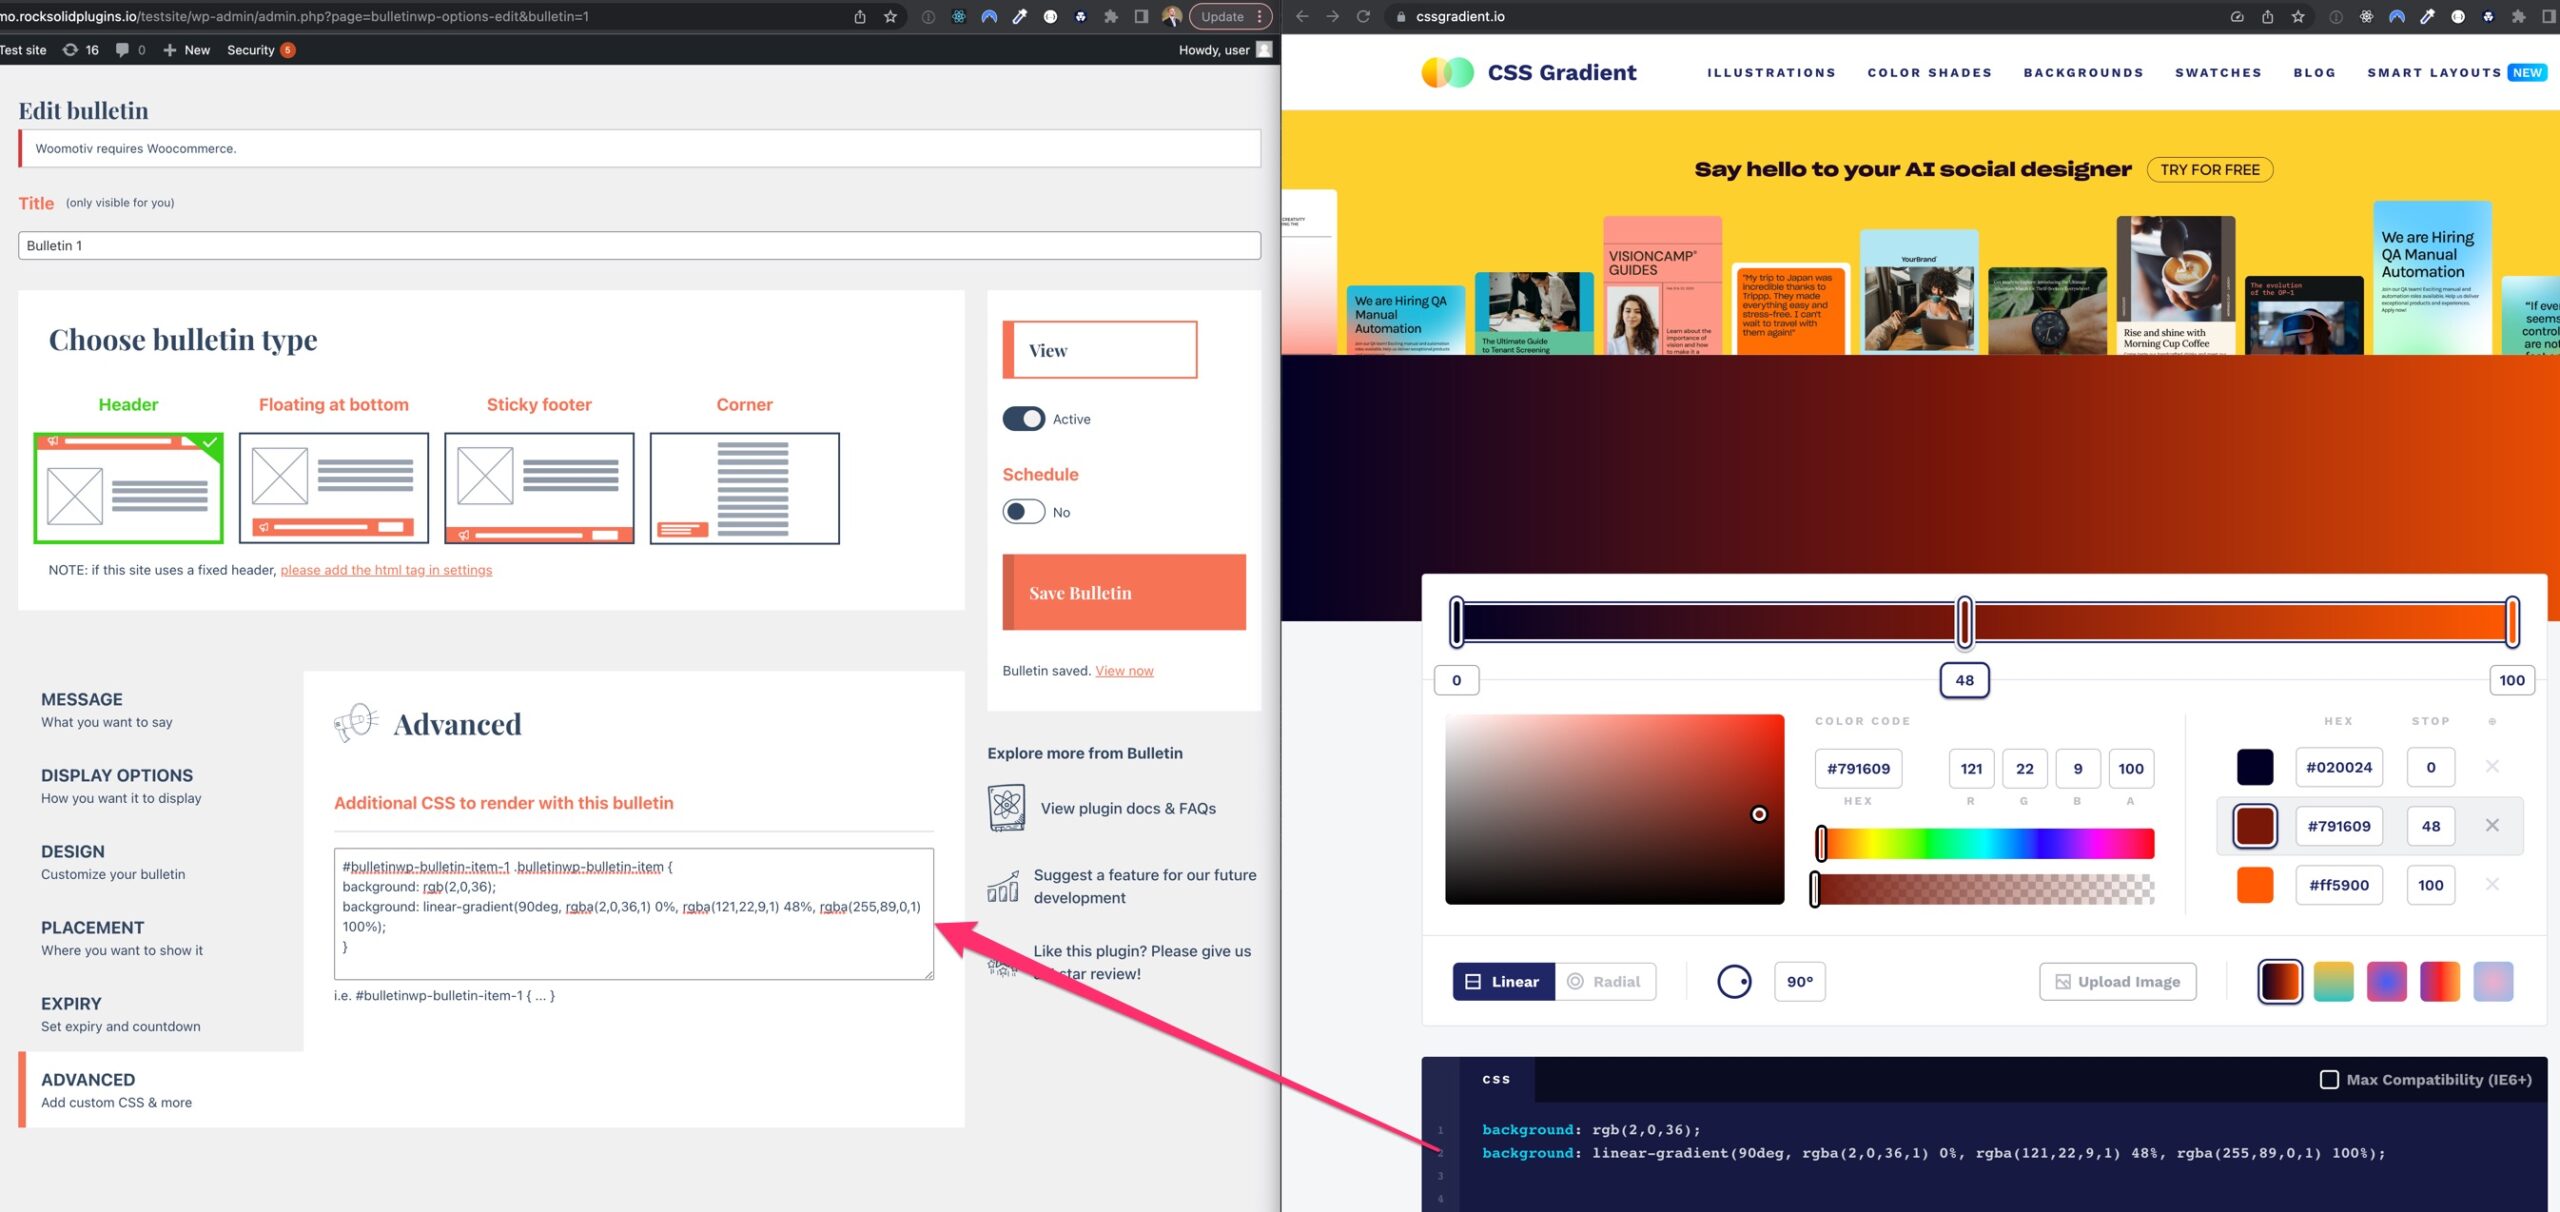
Advanced CSS
Using advanced CSS, you can add additional effects to Bulletin.
For example, should you wish to add a gradient, go to https://cssgradient.io/ and tweak the color options. Then copy the css and create this code:
#bulletinwp-bulletin-item-1 .bulletinwp-bulletin-item {

  background: rgb(2,0,36);

  background: linear-gradient(90deg, rgba(2,0,36,1) 0%, rgba(121,22,9,1) 48%, rgba(255,89,0,1) 100%);

}
Replacing -1 with the ID of your bulletin